Mounting/Installing
Political Campaign Signs
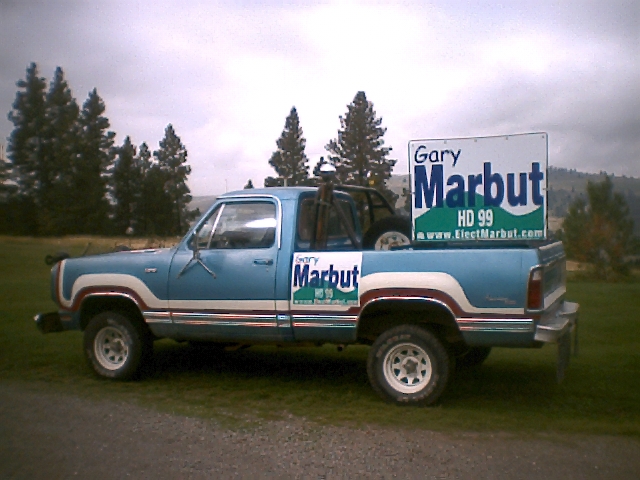
By Gary Marbut
This will be, hopefully, a short primer about how to deploy
campaign signs in Montana.
Legal Issues
Most cities in Montana have sign ordinances that usually prohibits
campaign signs larger than 4' X 5'. Check local ordinances
before
installing 4' X 8' signs inside city limits. There is
usually an
EXCEPTION in the ordinance for vehicle-mounted signs.
Otherwise
every Coca Cola delivery truck, and a gazillion others, would
require a
sign permit. So, some people have mounted 4' X 8' signs in
the
back of pickups to display in places that prohibit larger than 4'
X 5',
ground-mounted signs. An additional benefit is that these
mobile
signs can be moved now and then to other choice locations.
Some cities prohibit political sign placement in the "boulevard,"
that
strip of grass (or snow now) between the sidewalk and the
street.
So, again, check local ordinances.
Outside of city limits, the Montana Department of Transportation
prohibits signs in highway right-of-ways. Usually (but not
always), the fence bordering a highway demarks the edge of the
right-of-way. Usually, a sign may be attached to the highway
side
of a fence. The highway maintenance authorities get a bit
more
persnickety about signs on fences along Interstate highways.
If
your sign placement infringes on the highway right-of-way, the
Highway
Department will send out a crew to collect the signs, which then
get
thrown in the trash, wasting valuable sign resources.
This MDT regulation also applies inside city limits, where a
state-controlled roadways passes through a city. Since a
roadside
fence may not exist in these urban locations, careful attention
must be
given to where the right-of-way ends and private property
begins.
Usually the property owner will know where his property ends and
the
right-of-way begins, but not always. Sometimes a difference
of
opinion exists between MDT and the roadside property owner, in
which
case the MDT crew will trash signs it believes are in the
right-of-way
and discuss the matter only when someone calls and presses the
issue.
In order for a campaign sign to be located on private property
requires
the permission of the property owner. Most property owners,
if
asked, will allow political sign placement along travel
routes.
They are used to being asked. Fortunately for your
campaign, landowners able to give permission are more likely to be
Republicans.
When looking for sign locations, it is recommended
that the volunteer carry a clipboard with a permission form on the
clipboard. The top of the form should contain a blanket
statement such
as: "We the undersigned agree to give the Xxxx Xxxxxx
campaign
permission to install a campaign sign at the location
indicated."
Then, there should be columns for the person's PRINTED NAME, SIGN
LOCATION/ADDRESS, and SIGNATURE. Contact phone number and
date
would be good, too, but requires landscape printing of the form to
provide enough space.
(Sample Form - MSWord/.doc file)
Don't forget to promise the landowner that you will return and
collect
any signs after the political season. Your permission list
will
help you return to these locations to collect signs. Leave
your
contact information with the landowner so the landowner can report
any
weather damage to signs or vandalism.
Disclaimer
The Commissioner of Political Practices Website declares:
Political candidates must include the name and complete
mailing address of the candidate or the candidate’s campaign.
Example:
Paid for by Frank Smith
PO Box 292
Helena MT 59604
OR
Paid for by Smith for Senate
PO Box 292 Helena MT 59604
The candidate’s campaign treasurer may be included, but is not
required.
And:
On yard signs, billboards and other similar materials, the
disclaimer must be placed on the front of the materials, and must
be large enough to be clear and conspicuous—e.g., 1/4 inch tall
(24 point) letters on yard signs and 1/2 inch tall (48 point)
letters on highway signs.
Physical Installation
This is being written in January of 2008. We have had a week
of
intense cold in Montana. Many political sign mounting
strategies
require being able to drive something into the ground. The
ground
in Montana is now frozen solid - like pavement. Also, many
modern
campaign signs are made from plastic, which gets brittle in the
cold. The points at which signs are attached to something is
a
weak point in the plastic sign that can easily break, tear or
shatter in the
cold. Keep this in mind when mounting signs during cold
weather,
especially any signs subject to wind.
We definitely want to avoid signs becoming litter. Littering
is
offensive to the landowner, wastes sign resources, and does not
make
the candidate look good.
Many modern campaign signs are made from a plastic material called
"coroplast." This is like corrugated cardboard, but made
from
plastic. Coroplast has plusses and minuses. On the
plus
side, it is relatively inexpensive, light to ship and handle,
takes a
colorful image well, and stands up to moisture. On the minus
side, plastic becomes brittle in cold (the colder the more
brittle) and
coroplast tends to fold along the ribs under wind load when not
mounted
on something more rigid, such as wafer board (OSB - Oriented
Strand
Board). Both of these problems are reduced with smaller
signs,
such as yard signs.
Large Signs.
The task with large signs is to be able to mount them in a good,
visible location, with affordable materials stout enough to hold
and
last the campaign cycle. If a 4' X 8' coroplast sign can be
mounted with rigid backing, such as on a building or on a rigid
sheet
such as wafer board, that backing will solve some problems, though
it
will increase installation expense.
The most affordable yet secure
way to attach 4' X 8' coroplast signs to wafer board or particle
board
is with short drywall screws, washers and a cordless screw
gun.
Washers on the drywall screws are important! Without
washers,
wind may rip the sign off the screws. Washers should be
small so
they don't detract from the sign, but large enough for the
screw.
Get suitable washers from a hardware store. When you screw a
sign down to rigid backing, crank the screw far enough to pull the
coroplast up snug to the backing
but not so far you crush the coroplast. Use a minimum of six
screws (or more) per 4' X 8' sign, in the corners (1" away from
each corner) and
center, top and bottom.
For 4' X 8' coroplast signs not mounted on something rigid, they
really
need grommets to prevent wind load from ripping the coroplast off
the
attachments. Tent and tarp businesses have grommeting
machines. Grommets may also be applied with hand-operated
tools. There should be a minimum of six grommets per sign,
located as suggested above for screws, more if wind conditions may
be
extreme.
If you are mounting large signs flat on buildings, make sure your
attachment method is OK with the building owner. Attachment
to
buildings (or chain-link fencing) is MUCH simpler than erecting
free-standing signs.
The best way to attach free-standing, grommeted coroplast signs is
with
plastic or nylon wire ties. These are inexpensive and
available
from hardware or electrical supply stores. Be sure to pull
the
wire tie up snug so the sign doesn't rattle in the wind, and clip
the
excess wire tie with dikes to make it look tidy.
How to build stands.
Stands for free-standing signs can be constructed from wood or
metal. Probably the simplest and most cost-effective
mounting
system is to use 1/2" rebar. Rebar is metal rod with a
corrugated
surface that is used for strengthening poured concrete. It
is
available in 20' pieces from metal supply and building supply
stores. You will need a way to cut this rebar into the
lengths
you need, either with large bolt-cutters or a metal-cutting
saw.
The place where you buy the rebar will probably be able to cut it
to
the lengths you want, maybe for cutting a fee.
To mount a 4' X 8' sign, drive a 7' piece of 1/2" rebar 2' into
the
ground. This will not be easy to do in frozen ground.
A
sharpened point or chisel point on the rebar will help. You
willneed
a
special tool to drive the rebar. The best is a device made
for driving metal fence posts - a sort of slide hammer.
Borrow
one from somebody who uses metal fence posts. Don't try
to drive rebar, especially into frozen ground, with any sort of
regular
hammer. Don't try!
Drive another 7' stick of rebar 8'2" away
from the first. Hopefully, neither will hit a rock and both
will
be straight up and down. If not, they can be bent at ground
level
to make them straight up and down. What is most important is
to
get them well driven.
Before you mount your coroplast sign between these two posts of
rebar, you will
need add two horizontal pieces of rebar. If you don't
install
horizontal rebar, top and bottom, your coroplast sign will fold in
the
wind and look shoddy. Be prepared with two more pieces of
rebar
that are 8'4" long. Attach one horizontal 1" down from the
top of
the vertical rebar posts with nylon wire ties. These will
wrap
diagonally across the vertical/horizontal rebar
intersection. Put
one wire tie on each end to hold them (with a friend helping),
then put one more at each end,
at the opposite diagonal, to reinforce the joint.
Drop down 4'1" from the top horizontal rebar and install another
horizontal the same way. Then, attach your grommeted
coroplast
sign to this rebar frame with more nylon wire ties.
Alternate. A large
coroplast sign may be attached to a rigid backing as described
above
and then attached to just two pieces of rebar driven into the
ground,
without the horizontal cross pieces. Drill holes in your
backing
wafer board or particle board, at least 1" away from the edge, to
pass
your wire ties through to attach to the rebar.
Painting rebar.
Without
paint, rebar can rust quickly and look ugly (well, maybe not in
freezing weather). You may wish to
paint it. A simple way to paint a bunch of rebar is to make
a dip
tank out of 1 1/2" pipe, PVC or metal. Cap one end.
Stand
this pipe up somewhere where you can reach the upper end, such as
off
the side of a deck. Fill your pipe dip tank nearly full (but
not
clear full) of inexpensive, black (or your favorite color) latex
house
paint (hint, you can thin the paint with water). Dip each
piece of rebar into this dip tank, lift each out,
and stand them upright in a prepared place to drain and dry.
A
piece of baling wire or tie wire can be attached to the end of
each
piece of rebar before dipping to use to handle the piece.
Figure
out the height. If you will coat an 8' piece of rebar, your
dip
tank must be 8' tall, plus the top of your dipped rebar will be 8'
higher than that when you withdraw it from the tank. You'll
need
a friend to help with this, but two of you can coat a lot of rebar
quickly using this method.
Wood stands. Large
stands
for mounting 4' X 8' signs can be made from wood. If you are
not
an experienced carpenter, find an experienced carpenter to help
you
design and build these free-standing signs. There will need
to be
two horizontal pieces that sit on the ground, perpendicular to the
plane
of the sign, underneath each of two uprights. These are the
"feet." To withstand any wind
load, these horizontal feet will need to be at least 4' long,
better
6'. Drill 3/4" holes in the end of these feet, angled at 45
degrees, so you can stake these feet to the ground. Use
rebar
states about 2' long. Drive them into the ground at 45
degrees to
vertical. The stakes will hold the foot of the sign down
better
if they are angled at 45 degrees. Sandbags can be used to
anchor
the ends of the feet where stakes are not possible (such as on
pavement). Plan on
gussets between the feet and the uprights. These gussets can
either be structural sheeting such as plywood or wafer board cut
into
large triangles (minimum of 2' tall, better taller), or structural
wood
toenailed between the foot and upright at 45 degrees on both the
front
and
back sides of the upright member. You will either need to
build a
full
frame for a coroplast sign, or mount the coroplast on some rigid
backing material when using wood stands. Any carpenter can
make a
wooden stand from these instructions, using 2X4s.
Smaller Signs
Yard signs. Standard
yard
signs can be installed in many different ways, including stapled
up
with a staple gun, and mounted inside the front window of a
home.
However, the coroplast signs are designed to be mounted with the
wire
ladder stands sold with them. These stands are a problem
with
hard ground - pavement, rocky soil, hard-packed earth, or frozen
ground. The legs of these wire stands are supposed to be
driven
into the ground to hold the sign, but the legs are wimpy and only
bend
when trying to insert them into hard ground. Two alternate
methods are suggested for mounting yard signs using the wire
ladder
stands with hard or frozen ground (January in Montana).
Stake and tie. Bend
the
legs of the stand 90 degrees away from the plane of the sign, in
opposite directions. Drive two pieces of 1/2" or 3/8" rebar,
2'
long, into the ground leaving about 10" above ground, the same
distance
apart as the uprights of the wire ladder stand. Set the
stand
down with the bent legs flat on the ground, and tie the uprights
to the
rebar with tie wire or baling wire. Tie twice on each side,
high
and low on the rebar, and bend the ends of the remaining tie wire
down.
Wood blocks. Lumber
yards
often have damaged, twisted or curved 6" X 6"s that they will sell
cheap or donate. Lumber yards also have chainsaws. Get
the
yard to whack you off some 18" blocks of reject 6" X 6". Get
a
drill bit just a little larger than the upright wires of your wire
stands and at least 6" long. Drill a hole in each block, on
center between the ends, and center from side to side,
perpendicular to
the face of the block, and clear through the block. Set two
blocks on the ground at your chosen sign location and stick the
wire
stand legs into the holes you've drilled. You can even stick
the
wire legs a couple of inches through the far side of the block and
bend
them over with a hammer. These block feet will resist
minimal
(but not extreme) wind load on the sign. If the weather is
really
cold, pour a quart of water on the ground before putting the
blocks
down.
Maintenance and Vandalism.
Plan on checking your installed sign locations at least once each
week. Things happen to signs - weather, kids, animals, and
outright vandalism. You need to keep your candidate's signs
up
and looking good. Unfortunately, vandalism happens to
political
signs, sometimes by generic vandals, people with no respect for
property, and sometimes by political opponents or their
supporters. The most effective response to vandalism is to
get
the sign back up or replaced and keep it up.
Finally, be sure to retrieve EVERY sign you have installed when
the
campaign is over, win or lose. This is your
responsibility.
Plan for it.
More Info
Anyone with any more clever ideas about mounting campaign signs
may
send me an email to gary at marbut dot com and I'll post ideas
here. Send digital pictures of your sign installation and
I'll
post here what I can.
Ginny's sign:

